How to work with Lighting Interface RELUX - existing lighting fixtures
This task details how to use the RELUX lighting interface in rooms with existing lighting fixtures.
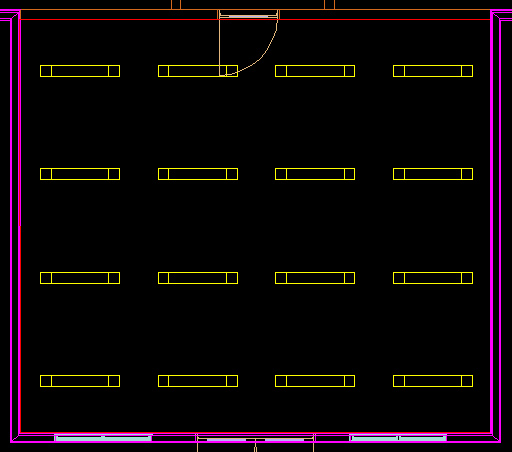
Room used is from previous task "How to work with Lighting interface RELUX", so lighting fixtures in the room have been placed with the Electrical discipline /RELUX interface.
-
Select
 (RELFUX). Click data point and right mouse click inside a room where you want to perform a lighting calculation.
Opens the Lighting Analysis dialog.
Click BBES->REFLUX.
(RELFUX). Click data point and right mouse click inside a room where you want to perform a lighting calculation.
Opens the Lighting Analysis dialog.
Click BBES->REFLUX. RELUX run in the background and the room dimensions, including width, length and height are transferred.
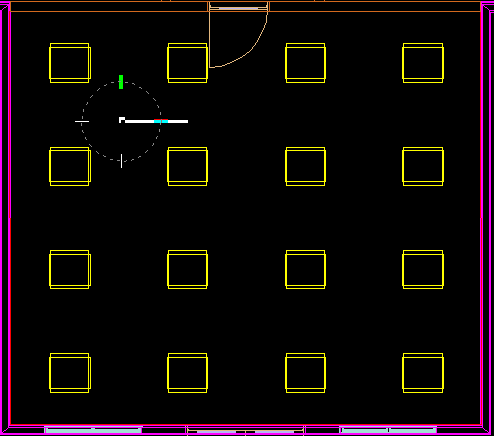
- Next, "Select All" using (or <Ctrl>+<A>). All lighting fixtures in the room are selected.
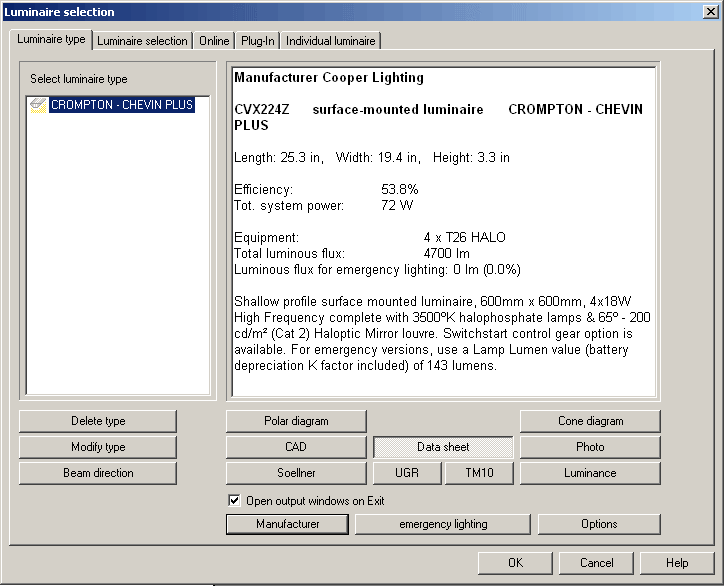
- First you need to select a lighting fixture. Click menu option. Opens the Luminaire selection dialog.
- First, click on the Luminaire type tab. The luminiaire manufacturer data and technical specification are displayed in the window to the right.
- Next, click on the Luminaire selection tab. Select Company, Luminaire name and Item number. Then click Replace>>.
- Next, make sure to save the RELUX file, use .
-
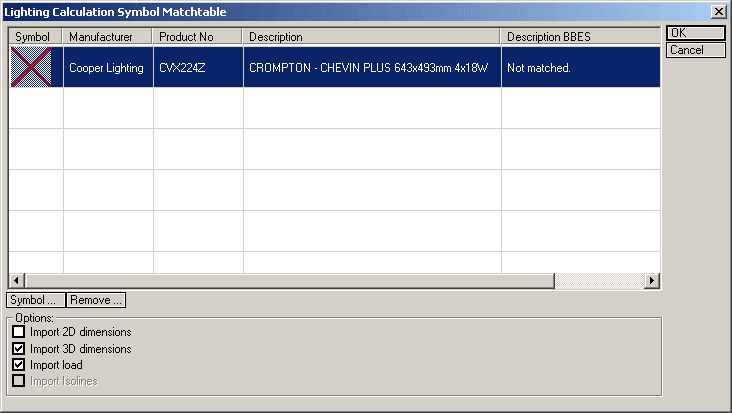
Next step, close RELUX. In the Lighting Analysis dialog, click RELUX->BBES.
Opes the Lighting Calculation Symbol Matchtable dialog.
The matchtable creates a connection between the lighting fixture that is imported from RELUX into the Electrical discipline drawing. This only needs to be done the first time a new lighting fixture is imported, Electrical discipline stores the link information (which can be changed at any later time).
The red "X" placeholder symbol indicates that there is no match for this luminaire available yet.
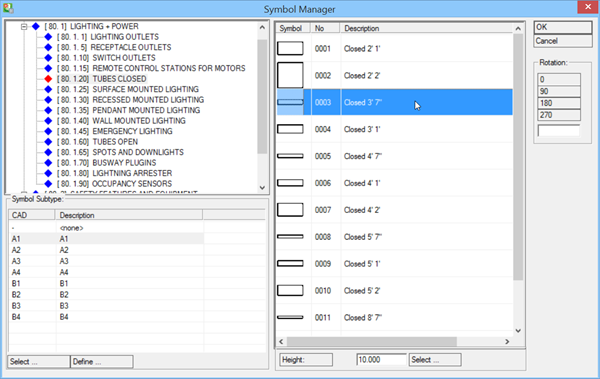
- Click Symbol. Opens the Symbol Manager dialog.
- Select the Closed 3' 7" symbol in the TUBES CLOSED section, and click OK. The RELUX lighting fixture is now linked to a lighting fixture symbol. You will see the symbols in place of red "X" placeholder in the Symbol Matchtable.
- Click OK in Symbol Matchtable dialog. Electrical discipline asks for confirmation "Erase existing symbols?" to overwrite existing symbols. Click Yes. The lighting fixtures are then replaced in the drawing.